
I'm baaack!! Remember me? It's Ashley! I was a guest blogger here about two months ago blogging about keeping your art space organized.
I first want to start off by thanking you all for the amazing comments and inspiring links. There were so many wonderful ideas and I'm so glad that many of you shared with us! Thank you, thank you, thank you!!
Okay, so you are probably wondering why I am back? Well, do you remember this video Amber posted showing off her fabulous art studio:
Amber challenged me to come organize it for her and I am here to tell you: CHALLENGE ACCEPTED! And of course we wanted to share the transformation with you! Here is my version of Extreme Makeover: Amber's Art Studio Edition.
My first task was to get a list of everything that Amber wanted in her new studio. I told her to make a list as if money were no object. I truly wanted to know exactly what she wanted to get out of her space.
Here was her wish list:
- Pegboards with buckets
- Re-purposed dresser for storage
- A baker's rack to hold her large paper (as seen in my previous blog)
- A classy shoe rack that could go at the end of her work table
- Clipboards to hang in-progress children's books on or other sketch ideas. That way she can just grab one on her way out the door this summer
- Place to hold her paper towels and freezer paper
- Shallow shelf for children's books
- Something to house "paper and tools, paper and tools"- since that is the majority of materials that she uses. Plus she also does her make-up in the studio so that area needed to be added as well. She needed room for it all!
I looked at her list and made an estimate that it would cost about $280 (NOT including the dresser). For those of you who don't know me, I am a bargain hunter. So let it be known that I was able to get everything but the shelf, bakers rack, and dresser for only $120!
Here is a list of the supplies I bought:
Pegboard
Buckets (12)
Ribbon
Spray paint
Clipboard (4)
Towel rods (2)
Paper towel holder (1)
Shoe rack
Banker boxes (for storage, they are cheap and can be decorated with wrapping paper because they are not the nicest things to look at. And they are cheaper than plain white storage boxes)
Screws and wall anchors (for pegboard and hanging items)
This past weekend I drove up to NYC, power tools in hand, and organized her office. Now let's take a look at some of the pictures and I will walk you through how I did it.
The pegboard was normal white. We couldn't have that. So I bought some iridescent spray paint and made it a little more interesting.
Before:

After:

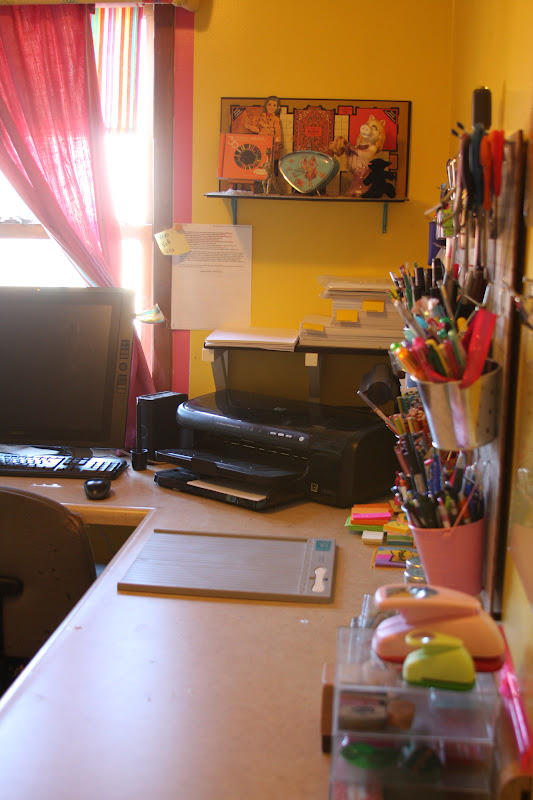
Alright, here is a before collage of what Amber's studio was looking like when I first came over.

A little intimidating, right? In a nutshell, she had a lot of stuff and nothing really had a home. She felt overwhelmed. First things first, we took everything out. Gutted it. Then we cleaned it (wiped down counter-tops and floors). It's always good to start off with a clean, empty room. I knew she was super excited about the pegboard so I put that up first to keep the morale up. She snapped this shot as I was drilling a large hole in her wall:
 |
Here is the end product:

This is a 2 x 4 peg-board from Home Depot for only $8! If you are wanting to try this at home, make sure to buy hooks to hang your items on. I would buy a multi-pack, they are the best! Here is an example from Amazon: Multi-pack. The most important thing you need to make sure it comes with is spacers. The pegboard cannot be attached directly to the wall because then you cannot hang your hooks on the board. So buy the spacers! It is super easy!

Luckily, with Easter around the corner, it was really easy to find these buckets. This tin one (shown below)actually had terrible ribbon on it so we switched it out to match the color in Amber's studio.


We kept finding scissors with every new drawer that was cleaned out!
Now there was a place for them :)
Now there was a place for them :)

Go ahead, Pin it! You know you want to!

Here is Amber's clipboard idea come to life. I bought clear ones so that she could decorate them in whatever pattern/paper she would like. I am excited to see how they turn out!


Another small project involved these towel rods:

We attached them under her desk and voila, there were her paper towel and freezer paper holders! Out of the way yet easily accessible!

After we put up the peg-board, clipboards, and towel rods, we had the tough task of going through everything we took out of the office and finding a place for it. Here are some amazing before and after pictures:


This is where she kept all of her makeup! On her scanner!


So what did we do with everything? I had Amber go through nearly every shred of paper in that office. It was her choice to keep, scan or throw away. The scan option was swell, because she uses something called Evernote that lets her easily scan documents into her computer. Then she can throw the paper away, thus eliminating most of the papers that were cluttering her office. Once most of the paper was gone, we organized the rest into these storage cabinets below. We had a craft cabinet, project cabinet, card drawer and paper shelf. Once everything was grouped into their categories, putting things away got a heck of a lot easier.


We used the "shoe rack" as her make-up holder by the mirror. We knew she wouldn't be doing her makeup anywhere else in the apartment so we had to make room for it in the studio. If it were anyone else (not living in NYC) I would tell them to move it to the bathroom. But when you have limited space (and natural light) you have to get creative. And that's what we did.

We did it! See, it wasn't so scary! The hardest part is getting started, but once you do, you will be so happy that you did. Here is a message Amber left on my Facebook wall the day after I left:
"Leaving my brand new office was practically torture. I'm pretty sure there are my fingernail prints trailing from the office door all the way to the subway station from dragging myself away this morning. I cannot wait to make home and make new art."
This is why I love organizing. :)
6 comments:
Wow! This looks amazing. Great job Ashley.
I love the iridescent peg board, and the fun bright buckets.
It looks so clean and organized.
I can't wait to see the art that Amber will produce in here!
Amazing! Makes me want to organize my house...maybe on April 19! It's all about making a goal and setting a realistic timeline! :D
Omyholyhec!!! Ashley you are amazing! Ashton and Amber both ranted and raved, but to see it in pictures is fantastic and SO many clever touches - the paper towel and freezer paper holders/the one stop peg board w a spot for everything that Amber-girl could possible need! Absolutely together. Absolutely brilliant!
WOOOOOOOOOoooooowwwwww!
This is too much for my mind to handle but I am going to put somebody to work on this for me! Thank you...you totally rock!
Woooooowww!!! SO inspiring! I can totally understand you, I would have wanted to stay home and make art in this phantastic space all day long, too! A clean space is very inspiring.
love
yaga
http://www.shinyubbles.org
<-- (= new blog!!!)
Post a Comment